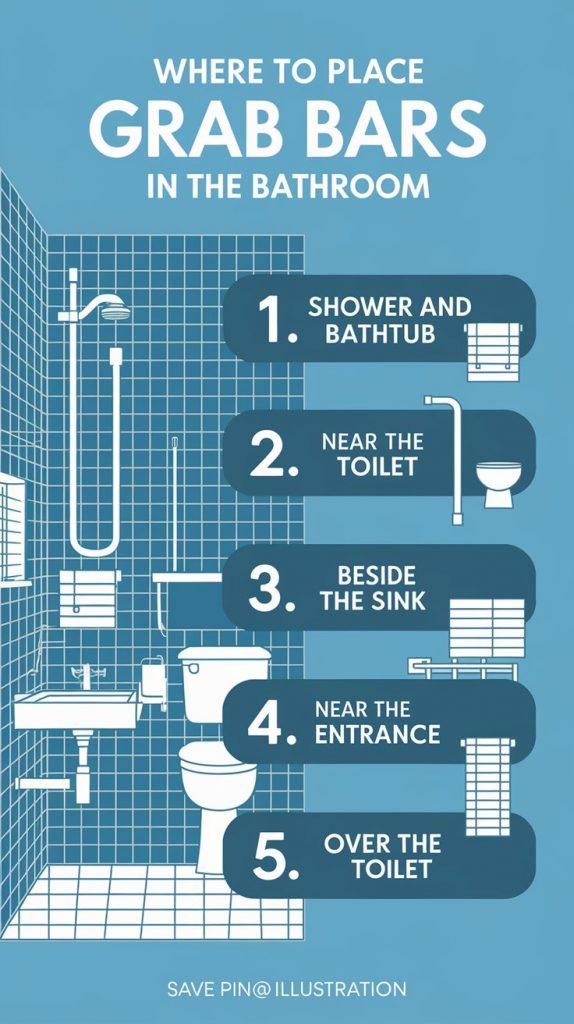
Where to Place Grab Bars in Bathroom

Installing sitting grab bars in the bathroom is one of the most effective ways to begin creating a safer and more accessible space for everyone, especially for seniors, individuals with limited mobility, and those living with disabilities. These grab bars are not just safety tools; they play a crucial role in enhancing independence and reducing the risk of slips, trips, and falls, which are common in wet environments.
As someone with experience in home safety and accessibility, I can affirm that the true value of a properly installed grab bar goes beyond physical support—it also offers emotional security and peace of mind for users and their caregivers.
In this comprehensive guide, we’ll walk you through the correct placement of grab bars in different areas of the bathroom, ensuring your space balances safety, function, and ease of use in every corner.
Where to Place Grab Bars in the Bathroom
Shower and Bathtub
The shower and bathtub areas are among the most vulnerable spots in the bathroom when it comes to slips and falls, making them a top priority for enhanced safety. These surfaces are often wet and slippery, increasing the risk of accidents, especially for individuals with balance or mobility challenges. To significantly improve security, installing grab bars is essential—starting with the most crucial one at the entrance to the shower. This vertical grab bar helps users stabilize themselves while stepping in or out, reducing the chances of losing balance.
For optimal support and accessibility, consider placing a total of three grab bars in these specific locations:
At the entrance: Position a vertical grab bar close to the entry point of the shower or tub. This provides immediate support for individuals as they navigate the step-in or step-out process.
Along the long wall: Install a horizontal grab bar along the back or long side wall of the shower or tub. This bar offers steady support for both standing and sitting movements. If the space allows, adding more horizontal bars at varied heights can cater to different user needs and enhance overall stability.
Near the faucet: Place a shorter vertical grab bar close to the faucet or control knobs. This is especially helpful when adjusting water temperature or when rising from a seated position, offering a firm grip when it’s most needed.
| Placement | Type of Grab Bar | Recommended Height |
|---|---|---|
| Entrance (Vertical) | Vertical Grab Bar | 33-36 inches from the floor |
| Long Wall (Horizontal) | Horizontal Grab Bar | Varies based on user height |
| Near the Faucet (Vertical) | Vertical Grab Bar | Near faucet or control handles |
Near the Toilet
As a general guideline, grab bars provide essential support when sitting down on or getting up from the toilet, making them an important safety addition for any bathroom designed with accessibility in mind. For the greatest level of stability and ease of movement, it’s recommended to install grab bars on both sides of the toilet area. This setup significantly reduces the risk of falls and gives users the confidence to move independently.
Side Wall: A horizontal grab bar should be securely mounted on the side wall next to the toilet. This bar should be installed at a height of 33 to 36 inches from the floor, which complies with the guidelines set by the Americans with Disabilities Act (ADA). It offers critical assistance for users when lowering themselves onto the toilet or pushing themselves back up.
Behind the Toilet: For additional support and balance, a second horizontal grab bar can be placed on the wall directly behind the toilet. This bar helps stabilize the user as they adjust their position or shift their weight, especially useful for individuals with limited mobility or core strength. Together, these bars create a secure and supportive environment that promotes both comfort and safety.
| Location | Grab Bar Type | Installation Height |
|---|---|---|
| Side Wall | Horizontal | 33-36 inches from the floor |
| Behind the Toilet | Horizontal | Adjusted for user comfort |
Beside the Sink
Although it’s not typically a standard feature in most bathrooms, installing a grab bar next to the sink can be a smart addition—especially for individuals who may need extra support while leaning forward to wash their hands, brush their teeth, or perform other grooming tasks. This added stability can be particularly helpful for those who experience balance issues or have limited strength in their lower body.
In this case, a vertical grab bar is the most suitable choice. Its upright orientation allows for a natural handhold when reaching forward, and it’s also highly accessible for individuals who use wheelchairs.
Placing this type of grab bar near the sink ensures that users have the extra assistance they need in a subtle, yet highly functional way, enhancing overall safety without disrupting the flow or design of the space.
Installation Tips for Grab Bars
Locate Wall Studs: Before installing grab bars, it’s crucial to identify the wall studs behind your bathroom walls. These provide the strongest support for mounting. Using a reliable stud finder will help you accurately locate them. If studs are not available in the desired spot, make sure to use high-quality wall anchors that are specifically designed to hold heavy loads securely.
Height and Position: The installation height should be customized to suit the needs and reach of the individual who will use the grab bars most often. Generally, the recommended height is between 33 and 36 inches from the floor. However, it’s important to physically test the proposed position before finalizing the installation to ensure it’s both easily accessible and comfortable to grip.
Proper Anchoring: Using the right mounting hardware is essential to guarantee that the grab bars can bear adequate weight. In most cases, the bars should be able to support at least 250 to 300 pounds. This ensures durability and reduces the risk of failure, which is critical in preventing accidents. Make sure all screws, brackets, and fasteners are tightly secured and built to last.
| Installation Step | Instructions |
|---|---|
| Locate Wall Studs | Use a stud finder for secure anchoring |
| Determine Height & Position | Ensure user comfort, 33-36 inches from floor |
| Proper Anchoring | Use appropriate mounting hardware |
Maintenance and Safety Tips
In summary, grab bars are a vital component of bathroom safety that should be regularly maintained to ensure they continue to serve their purpose effectively. These seemingly simple fixtures play a major role in preventing accidents and offering peace of mind, especially in a space where slips and falls are common.
Inspect Regularly: Make it a habit to check each grab bar for any signs of looseness, rust, or wear and tear. Even the most securely installed bars can become loose over time with regular use. If you notice any movement or instability, tighten the hardware immediately to restore its reliability.
Clean Frequently: Maintaining cleanliness not only keeps the grab bars hygienic but also helps them remain effective. Use a clean cloth dampened with vinegar or a gentle cleaning solution to remove soap scum, mildew, or grime that can make the surface slippery. Don’t forget to clean the surrounding floor area using a sponge mop, as a clean and dry floor further reduces the risk of slipping.
Conclusion
Installing grab bars in the bathroom is a proactive step toward creating a safe and accessible environment for everyone—whether it’s for yourself, a family member, or someone you care for professionally. Carefully choosing where to place each grab bar is just as important as the installation itself.
Once installed properly, these bars serve their intended purpose, making the bathroom a much safer place. If needed, don’t hesitate to work with qualified professionals to ensure everything is done correctly and up to safety standards.
FAQs
How high should grab bars be installed in the shower?
Grab bars in the shower should typically be installed at a height ranging from 33 to 36 inches above the finished floor. This range is consistent with the guidelines set by the Americans with Disabilities Act (ADA), ensuring the bars are both accessible and ergonomically positioned for most users.
It’s also wise to test the height in relation to the primary user’s needs before finalizing the installation.
How many grab bars should I install in the shower?
For comprehensive safety and accessibility, it’s recommended to install at least three grab bars within the shower area. One should be placed vertically at the entrance to assist with entering and exiting the shower. A second, horizontal bar along the back or long wall provides support while standing or sitting.
Finally, a shorter vertical grab bar near the faucet or controls offers additional stability when adjusting the water or rising from a seated position. This setup ensures well-rounded support and minimizes the risk of accidents in every part of the shower.
Can grab bars be installed on tiled walls?
Yes, grab bars can absolutely be installed on tiled walls, but it requires careful attention to ensure safety and durability. It’s essential to locate wall studs behind the tile using a stud finder. Mounting the bars directly into the studs provides the strongest and most secure hold.
If the studs are not ideally located, high-quality wall anchors specifically designed for tile and heavy-duty use should be used. Precision and the right tools are key when drilling through tile to avoid cracks and ensure a safe, lasting installation.
Are suction cup grab bars safe?
While suction cup grab bars may seem convenient due to their tool-free installation, they are not considered a reliable or safe option for long-term or weight-bearing use. These bars can lose suction over time or when exposed to moisture, which increases the risk of them detaching unexpectedly.
Because of this, they should not be relied upon for supporting full body weight and are generally discouraged in settings where safety is a priority, especially for elderly or disabled users.
How do I maintain grab bars?
Maintaining grab bars is simple but essential to ensure they continue to function properly. Clean them regularly using mild, non-abrasive cleaning products to prevent soap buildup and maintain a non-slip surface.
Additionally, inspect the bars frequently to check that they remain tightly secured to the wall and show no signs of rust, damage, or looseness. Tighten any loose hardware immediately to keep the bars stable and safe for everyday use.


